# Example of the X-Ray Workflow
This example shows how to add tracking for tasks in a process running on ProcessMaker platform. Here is the information we have regarding these tasks:
* Each task has a **status.**
* Each task has a **parent request** to which it belongs.
* Both the status and parent request information are visible in the UI.
* This information should be captured using X-Ray.
To track the tasks using the X-Ray desktop tool, following configuration is required:
1. [Add Application, Window, and Structured Process](#add-application-window-and-structured-process)
2. [Configure UI Data Collection](#configure-ui-data-collection)
## Add Application, Window, and Structured Process
### Step 1: Add ProcessMaker Platform as an Application
1. Navigate to **Admin Panel → Configure Data Collection → Track New Application**.
2. Add a new application and name it **ProcessMaker**.
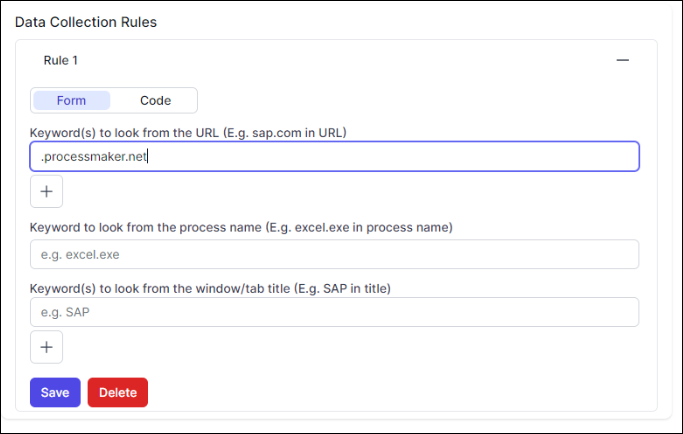
3. After that, create a new data collection rule for the application.\
Since a typical URL for the platform might look like `https://mycompany.processmaker.net/`, you can use `processmaker.net` as a keyword to search within the URL.
### Step 2: Add a Task Window
Follow these steps to track the task window and categorize it correctly:
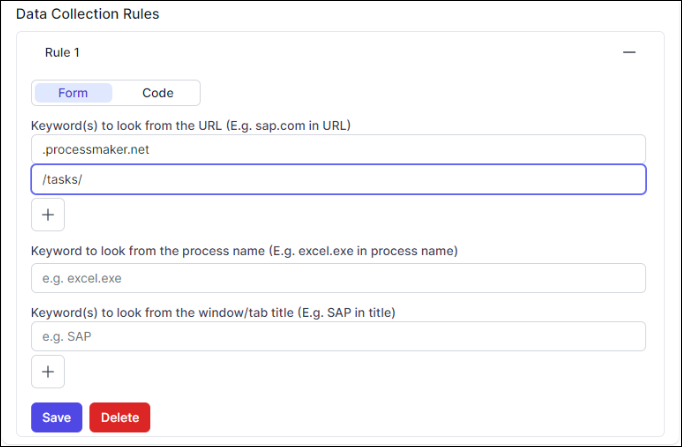
1. Identify the relevant URL pattern. A typical task window URL on the platform is \ `https://mycompany.processmaker.net/tasks/46027/edit`
2. Notice that the `/tasks/` part of the URL is key to identifying task pages.
3. Navigate to the **Window-Level Data Collection** tab and click **Add New Window**.
4. Name the window **Task (an alternate name can be used as well).**
5. Then, add the appropriate data collection rule for the window using `/tasks/` as the identifier.
### Step 3: Add a Structured Process for the Task Object
Follow these steps to create a structured process for the task,
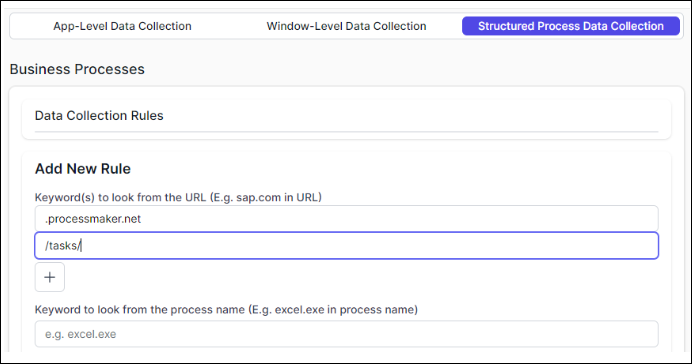
1. Navigate to the **Structured Process Data Collection** tab.
2. From the following URL \ `https://mycompany.processmaker.net/tasks/46027/edit`\
we can identify that `46027` is the unique process ID for the currently open task. In process data collection, this unique number must be tracked.
3. In the **Business Processes** section, click the **Add New** button.
4. In the **Add New Rule** section, apply the same data collection rule that was set for the task window, ensuring the task’s unique process ID is captured.
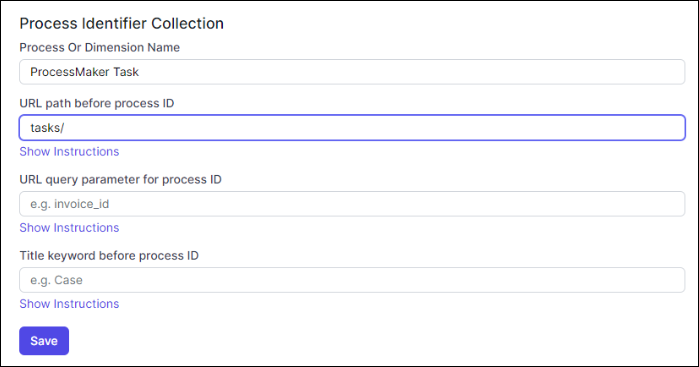
5. The keyword preceding the task ID is `/tasks/`, so add this keyword to the **URL path before process ID** field.
6. Additionally, set the **Process Name**. For example, **ProcessMaker Task**.
***
## Configure UI Data Collection
In addition to tracking the task, it's also important to capture details like the task's **Status** (e.g., *In Progress* or *Overdue*) and the **Parent Request** linked to the task. While this information isn’t included in the URL or title, it is displayed within the UI.
To collect these values, **Reactions** can be configured to retrieve the necessary data from the UI elements. Follow these steps to configure **Reactions**:
### Step 1: Capture the X-Ray
1. Navigate to **Admin Panel → Configure Data Collection → X-Ray Tooling**.
2. If the toolchain is not yet installed, follow the detailed instructions provided in [Data Collection with X-Ray](https://processmaker.gitbook.io/worfellow/8t05gI5NaT1hoVDtEm3k/defining-data-collection/data-collection-with-x-ray).
3. Once installed, open **workfellow\_x\_ray.exe**.
4. Open any task in the ProcessMaker platform to use as an example for the configuration process.
5. Press **Alt + A** to capture an X-ray of the task page.
### Step 2: Open The X-Ray With Desktop Tool
1. Launch **desktop.exe**.
2. Locate the **X-Ray** folder on your computer and open it.
3. You should now see the captured X-ray from the task page displayed in the desktop tool.
### Step 3: Locate The UI-Elements from the X-Ray
1. In the example X-ray shown above, the task status is **Overdue** and the parent request is **#458 Budget Allocation 2024**. The goal is to find the path to these UI elements within the X-ray tree.
2. Starting with the status value, search for "OVERDUE" by filtering the element name.
3. Click **Filter** and input the search filter:\ `"OVERDUE" == Name`
4. Click **Apply** and then check the **Show Parents** box. The search should result in one element corresponding to the status value.
5. Copy the result pattern from the **Pattern Window**:
6. Similarly, locate the request name. In the X-ray screenshot, the request name is **#458 Budget Allocation 2024**. To simplify the search, look for the element containing **#458**, as it’s likely to always appear as part of the full request name.
* Use the following search filter to quickly find the targeted element:\ `"#458" in Name`
7. Similarly, copy the pattern for this element again.
### Step 4: Add The Reaction to the Admin Panel
Follow these steps to integrate these patterns into the data collection configurations:
1. Navigate to **Admin Panel → Configure Data Collection → Advanced Setup → X-Ray Tooling**.
2. Scroll to **Task 4**, find the **ProcessMaker** app, and click the **Add Reactions** button.
3. Select the **Window** for adding the **Reaction**.
4. Copy and paste the **Reaction** for the status field from the desktop tool.
5. Enter a name, and click **Save**.
6. Repeat the same operation for the Parent Request:
7. Once these patterns are saved, they are added to the data collection configuration. As a result, each time the user visits the Task page in the ProcessMaker application, these two values will automatically be captured during the visit.
### Step 5: Configure The UI values as Structured Process Dimensions
Now that the UI data is being collected, follow these steps to associate these values with the appropriate Structured Process as dimensions:
1. Navigate to **Admin Panel → Structured Processes**.
2. Locate the **ProcessMaker Task** process that was previously added.
3. Click the **Dimensions** link.
4. Click the **Add a Custom Dimension** button.
5. Enter **Task Status** as the dimension name, and select the **Task Status** reaction from the key list.
6. From the **Type** setting, select **STEP\_SPECIFIC**, as the status of the task can change during the process.
7. In a similar way, add **Parent Request** as a dimension and select **TRANSACTION\_SPECIFIC** as the type. Since the parent request number remains consistent throughout the request and it's more relevant to track the latest value for the entire transaction, this type is most suitable.